📧 Thinking about taking control of your email? Switching to a self-hosted email provider might be the next big step for you! 🌐
In a world where data privacy is paramount, self-hosting your email can offer a level of control and security that mainstream providers sometimes can’t match. Here’s why you should consider making the switch:
1️⃣ Privacy: Your data remains yours. No third-party companies scanning your emails for targeted ads.
2️⃣ Customization: Tailor your email experience to fit your needs perfectly. From interface tweaks to storage options, the choice is yours.
3️⃣ Security: Stronger control over security measures means you can fortify your email against potential threats.
4️⃣ Freedom: Say goodbye to restrictive storage limits or expensive premium plans. With self-hosting, you set the rules.
5️⃣ Learning Opportunity: Delve into the technical aspects of email hosting if you’re keen on understanding more about servers, domains, and protocols.
Switching may seem daunting, but the rewards are substantial. Whether you’re an individual, a small business, or an enthusiast looking to expand your tech skills, self-hosting email could be a game-changer.
Ready to take charge of your digital communication? Let jump in to this guide on setting up your self-hosted email.
How to Self-Host Email with Roundcube
In an era where privacy and control over personal data are more important than ever, self-hosting your email is a powerful way to reclaim control over your digital communication. This guide will take you through the process of setting up your self-hosted email service using Roundcube, a trusted and user-friendly open-source webmail client.
Why Self-Host Email with Roundcube?
Self-hosting your email offers several advantages:
Privacy and Security: You have full control over your data, reducing the risk of it being accessed or harvested by third parties.
Customization: Tailor your email experience to suit your preferences, from user interface themes to security settings.
Cost Efficiency: Save on subscription fees by managing your email service on your server. However, keep in mind that you’ll need to pay for hosting on a cloud service and may incur additional costs if you require more storage.
Prerequisites
Before diving into the setup process, here’s what you’ll need:
1. A Domain Name: Purchase a domain name (e.g., yourname.com) from a registrar like Namecheap, GoDaddy, or CloudFlare.
2. A VPS or Dedicated Server: Ensure your server meets the minimum requirements for hosting email (e.g., sufficient storage, RAM, and bandwidth).
Step-by-Step Guide to Setting Up Roundcube
Step 1: Setting Up Your Server
Choose a Hosting Provider: Select a reliable hosting provider that offers VPS or dedicated server solutions. Popular choices include DigitalOcean, Linode, or AWS.
For this guide, I’ve chosen Linode as my hosting provider since I already host other applications there. Consolidating services under one provider simplifies management. Additionally, Linode’s $5/month plan is perfect for self-hosting email at an affordable price.

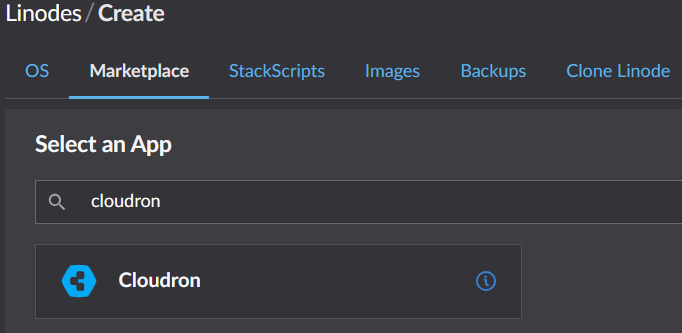
Install Cloudron:
Leverage the Linode Marketplace to install Cloudron, an all-in-one platform for hosting applications on your server. Cloudron simplifies the deployment and management of apps like Roundcube, making it an excellent choice for self-hosting. Detailed instructions on installing Cloudron can be found here here.
Configure Your Domain:
Once Cloudron is installed, assign a domain name to your instance. I used a domain purchased through Cloudflare, as it provides robust DNS management and security features.
Detailed guide on installation can be found here.
Set Up DNS:
Since my domain is managed through Cloudflare, I selected it as my DNS provider during the Cloudron setup process. I logged into my Cloudflare dashboard, retrieved my API key from my account settings, and entered it into the API key field in Cloudron under DNS sesttings for seamless integration. Cloudron will automatically configure DNS records, streamlining the process.
Step 2: Installing and Configuring Roundcube
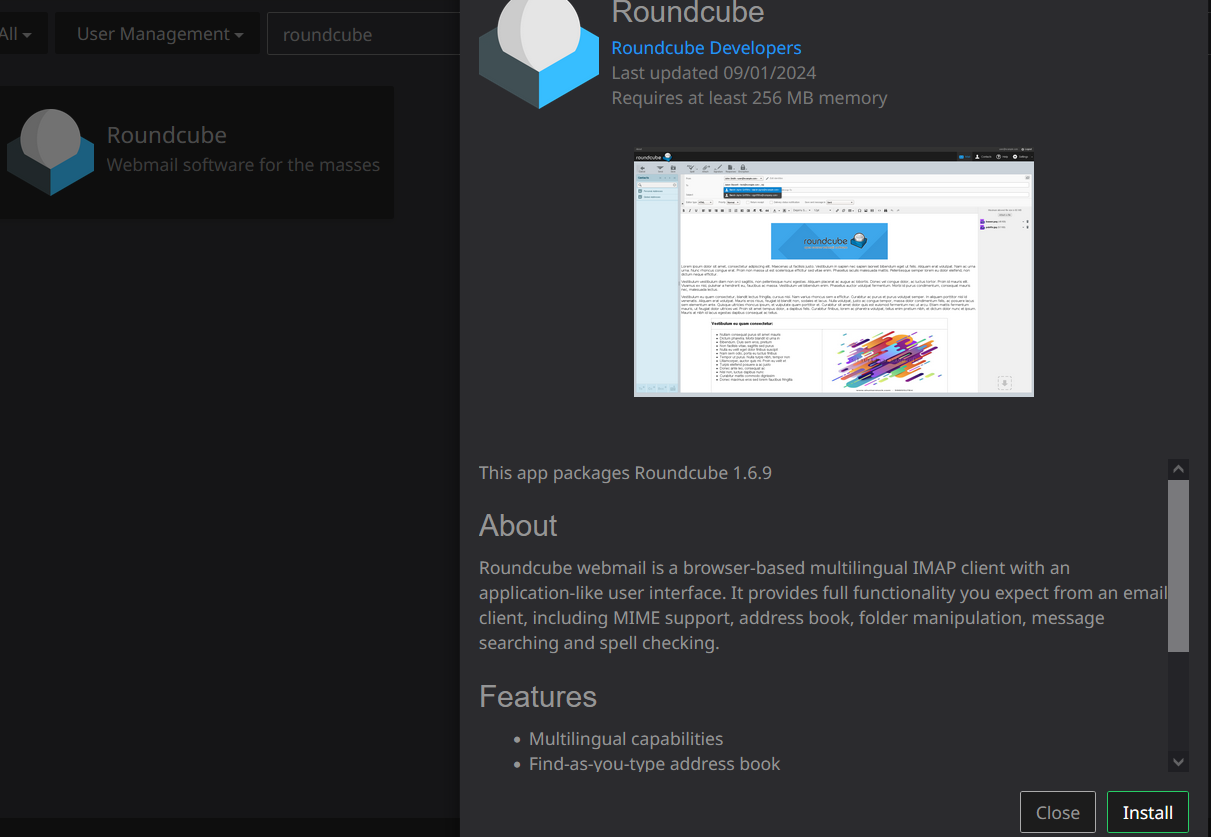
Install Roundcube:
With Cloudron configured, access the Cloudron dashboard and navigate to the App Store. Search for “Roundcube” and click to install it. Cloudron handles the deployment process, so you won’t need to manually configure dependencies or databases.
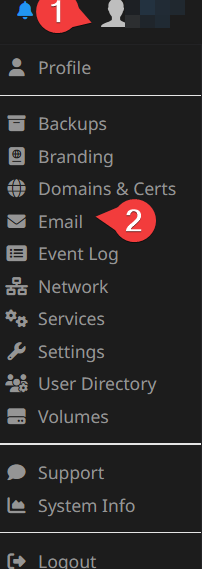
Configure Email Settings:
After installing Roundcube, configure email settings by:
Navigating to your profile in the Cloudron dashboard.
Selecting the “Email” section.
- Set up mailboxes for your domain.
- Verify the DNS status to ensure records are correctly propagated.
- Optionally set up a catch-all email address for unassigned email addresses.
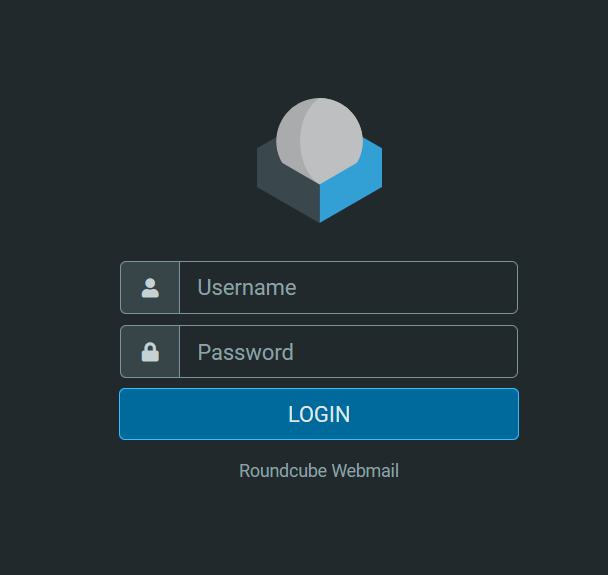
Finalize Roundcube Setup:
Access Roundcube through the Cloudron dashboard and adjust user preferences, such as:
- Adding email accounts and aliases.
- Configuring display settings.
- Customizing spam filters or email forwarding.
Step 3: Securing Your Email Server
SSL/TLS Certificates:
Cloudron automatically manages SSL/TLS certificates for your domain. Confirm that HTTPS is enabled for your Roundcube instance to secure all email communication.
Firewall Setup:
Configure your server’s firewall (via Cloudron or your VPS settings) to allow necessary ports, such as:
80 (HTTP)
443 (HTTPS)
25 (SMTP)
587 (SMTP Submission)
993 (IMAP)
Block all unnecessary ports to reduce potential attack vectors.
SPF and DKIM:
Set up SPF (Sender Policy Framework) and DKIM (DomainKeys Identified Mail) records to:
Improve email deliverability.
Protect your domain from email spoofing.
You can configure these records via the Cloudron dashboard. Navigate to the email settings for your domain, and Cloudron will provide the necessary SPF and DKIM values to add to your DNS provider.
Step 4: Testing and Maintenance
Test Your Setup
Send and receive test emails to verify that all components are working correctly. Use the built-in email testing tools in Cloudron or Roundcube to troubleshoot any issues.
Regular Updates
Keep your Cloudron instance, Roundcube app, and server software updated to safeguard against security vulnerabilities and ensure optimal performance.
By following these steps, you’ll have a fully functional and secure self-hosted email service using Roundcube.
Conclusion
Setting up a self-hosted email service using Roundcube empowers you with greater control, privacy, and customization over your email communications. Leveraging tools like Cloudron simplifies the process, even for users without extensive server management experience. By following this guide, you’ll have a fully functional, secure email solution hosted on Linode’s affordable infrastructure.
While self-hosting requires some initial effort, the long-term benefits of enhanced security, cost savings, and control make it a rewarding choice for personal or small business use.